Creating Revisions (Redlines)

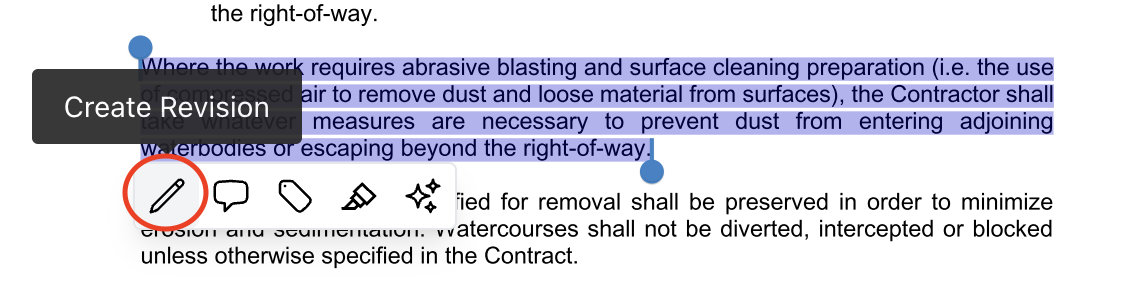
Step 1: 

Scroll to the section of the document you want to make a revision to and highlight the clause. 
In the tooltip, click 'Create Revision".
The revision module opens with the section number auto-filled (you can edit it).


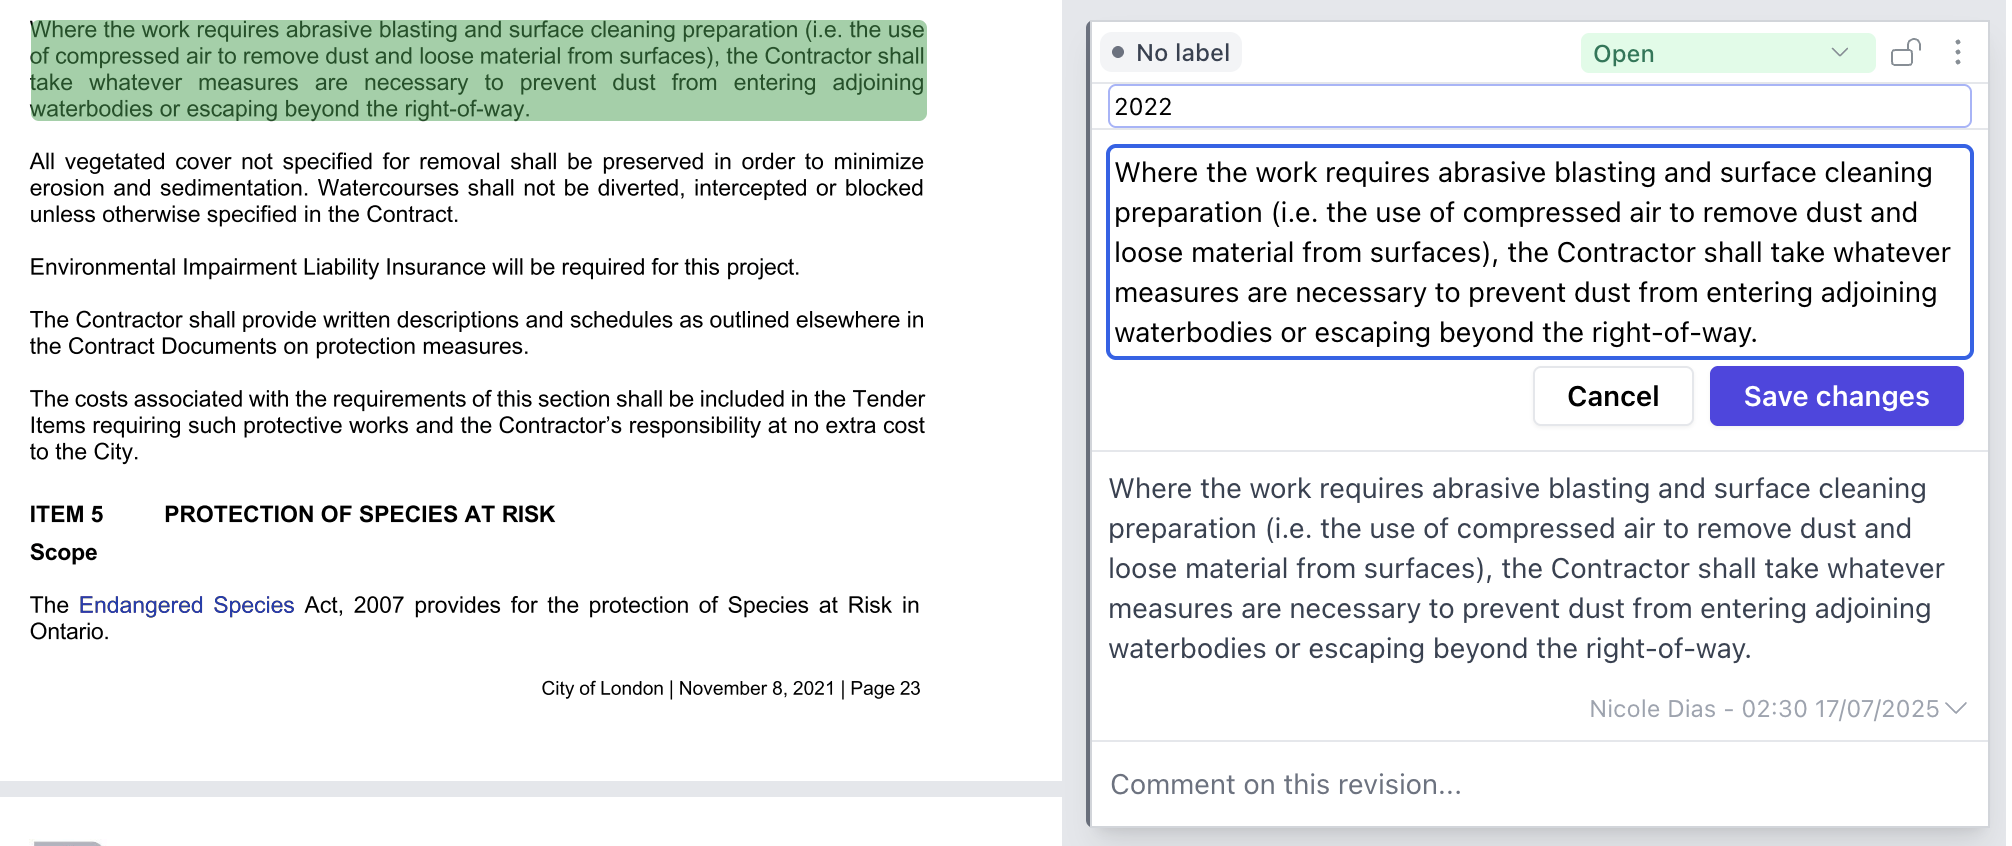
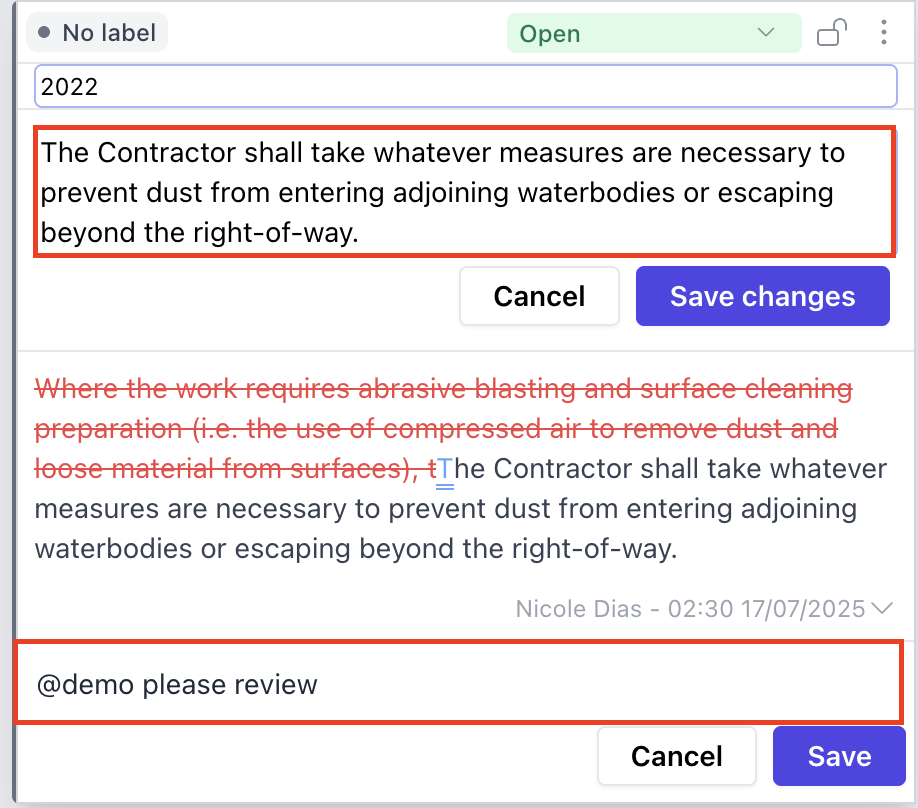
Step 2: 

Remove, edit, or add language to generate a redline version.
Add a justifying note or NTD (note to drafter) as needed. 
Similar to comments, you can label your revision (e.g. High Priority, Risk...)
Save to lock the revision into your document history. 


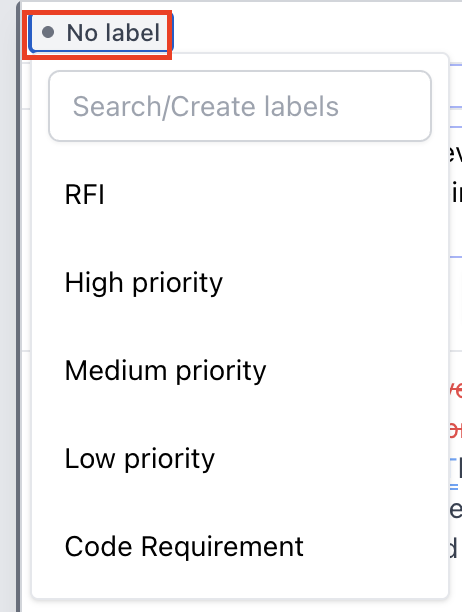
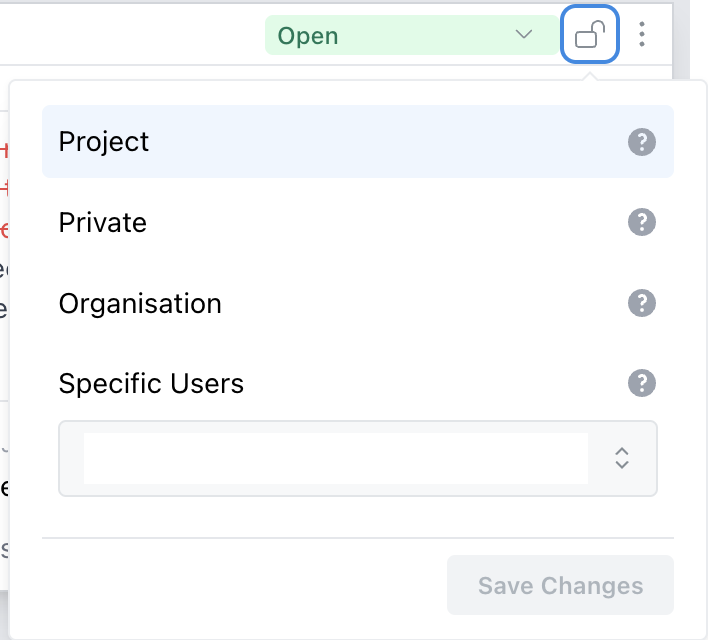
Step 3: 

Change the redline access control by seleecting:

  1. Project: Allows anyone with access to the project to view and add sub-comments to your comment.
  2. Private: This comment is only available to you.
  3. Organisation: Only users who have access to this project, and are in the same organisation as you can view this comment.
  4. Specific Users: You can specify exactly who has access to this comment with the dropdown.


Step 4: 

Navigate to the Comments workspace and click the three-dot menu (⋮) in the top right corner. From there, you'll have the option to Export to Excel or Export to Word.

Export to Excel will provide a structured breakdown of all comments and changes, including:

  • Section number
  • Original and revised text (redlined)
  • Status (e.g., Accepted, Not Accepted, Partially Accepted)
  • Any comment threads or labels

Export to Word will generate an updated version of the document with all redlines and tracked changes embedded directly into the file.